Connect and monitor
Drone Control combines the drone selector, map, live flight data, mission tools, and camera windows. The exact controls depend on your role, aircraft type, connection state, and available data.
The connection, live telemetry, and map procedures on this page are for Administrators and Operators. The current Suite interface does not open live telemetry links for Client accounts. The camera launcher also depends on connected telemetry, so Client accounts encounter the current video-launch limitation.
Before you begin
- Use a Lizard or Bulldog of your company, with remote access enabled and a configured gateway. Select a drone lists only those; an account not linked to a company sees every such drone it can access. X84 records are managed under Drones and are not offered in Drone Control; see Type and configuration code.
- Confirm the correct aircraft name and serial number.
- Confirm that the aircraft and its communications equipment are powered.
- Confirm that the mobile or network connection is expected to be available.
- Close other sessions if your operating procedure limits simultaneous control.
- Do not begin a flight solely because the Suite reports Connected.
Connect to a drone
- Open Drone control.
- In Select a drone, search for and select the correct aircraft.
- Confirm the selected name and serial number.
- Wait until flight data updates, the map loads, and the drone marker appears. There is no connect button: the Suite connects by itself and keeps retrying while the drone is unreachable.
Once the drone is live, the list collapses to give the map its space. The drone's name and link indicator stay at the top left of the map; select them to reopen the list.
Do not continue with mission or flight actions while values are blank, stale, or marked unknown.
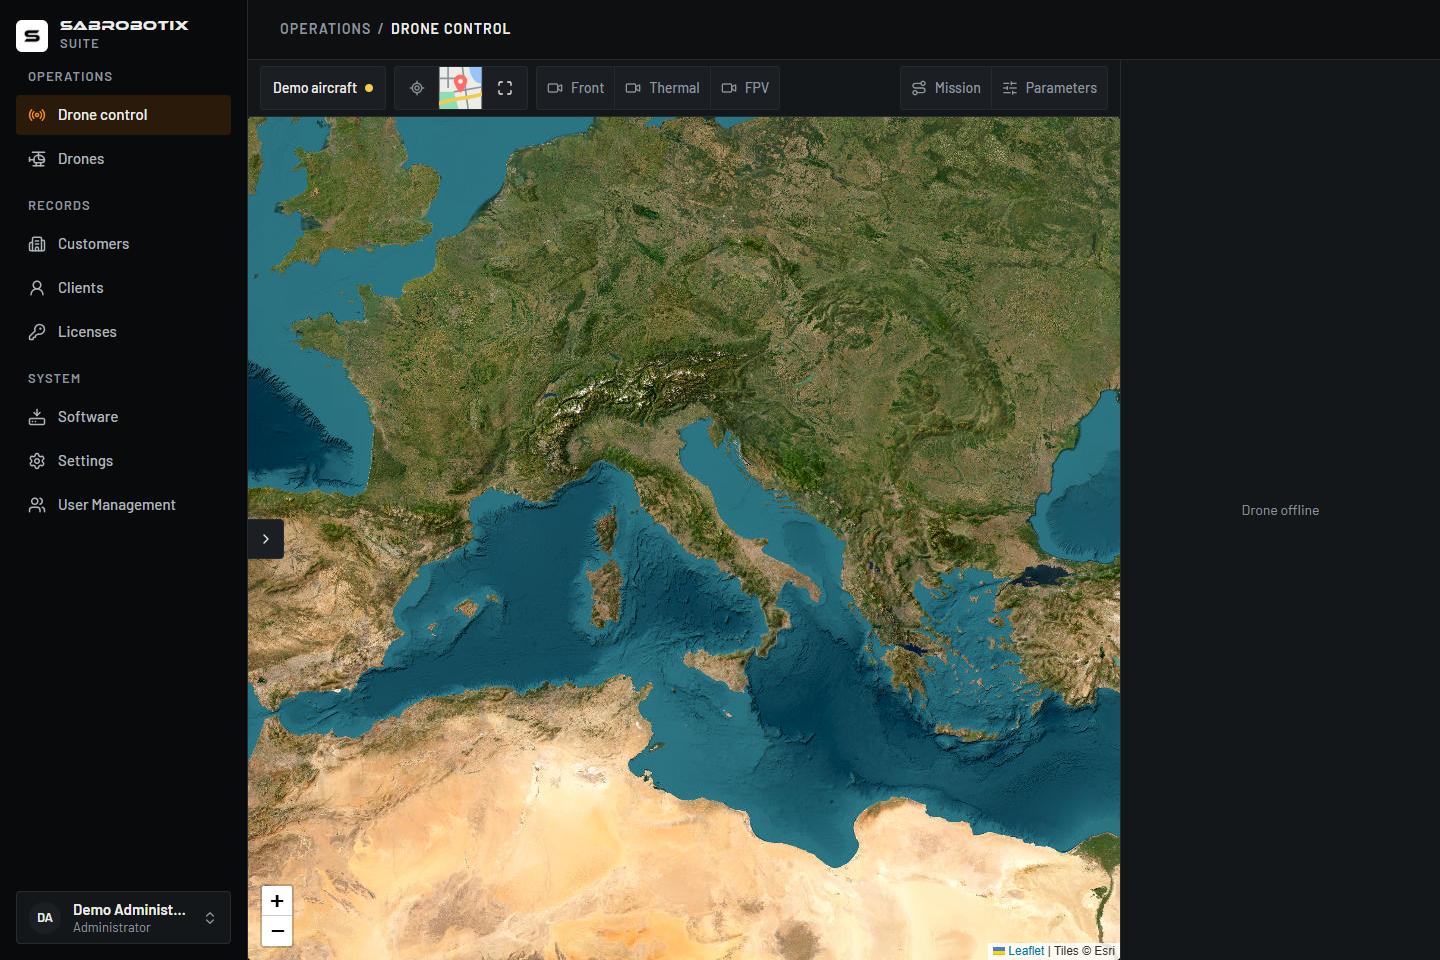 Administrator view with the selector collapsed. No vehicle is connected; the map remains available while live flight instruments and flight commands are absent and camera launch is disabled.
Monitor the fleet
For Administrators and Operators, opening Drone Control starts telemetry links for the vehicles in the list. A vehicle can therefore already report Live telemetry before you select it.
Use the indicator beside each drone in the list to distinguish live telemetry, connection attempts, stale telemetry, and link failures. Select a drone from the list or select its labelled marker on the map to make it the target of the flight-data panel, mission tools, and camera buttons. Confirm the selected name and serial number before using those controls.
Selecting one drone does not close the other vehicles' telemetry links. Each vehicle has its own connection state; a failure on one does not mean the whole fleet is offline.
Understand the three connection states
The link has three parts: the WebSocket, the LTE gateway, and the autopilot. An open WebSocket proves only that the browser can reach the gateway. It does not prove that the gateway is still receiving MAVLink data from the autopilot.
The Suite records when each frame reaches the browser and shows its age. MAVLink heartbeats normally arrive once per second. If no accepted frame arrives for 10 seconds, the telemetry becomes stale even when the WebSocket remains open. Live values are hidden and current-state actions stay disabled until a new frame arrives. This timeout uses the browser's monotonic clock, so a wrong Jetson or autopilot clock cannot make an old display look live.
The source timestamp is retained only to prevent an out-of-order frame from replacing newer flight values. Freshness is tracked separately for each vehicle's link; selecting another drone shows that link's existing state.
When something is wrong, the Flight data panel says which part failed:
| Message | What it means | What to do |
|---|---|---|
| Suite session expired | Your sign-in has expired. | Sign in again. The Suite stops retrying until you do. |
| Remote access has been disabled | An Administrator or Operator switched off remote access for this drone. | The link stays closed until it is switched back on from the drone's page. |
| No longer have access | Your role or the drone's assignment changed. | Ask an Administrator. |
| The Suite is not answering | This device cannot reach the Suite. | Check your own network; the Suite retries on its own. |
| The drone's gateway is not answering | The Suite is fine, the vehicle's tunnel or mobile link is not. | Check power and coverage; the Suite retries on its own, less often the longer it lasts. |
| Gateway reachable, autopilot not sending data | The onboard computer answers, the autopilot does not. | Check the autopilot and its cable to the onboard computer. |
| Telemetry is stale | The link is open but no frame arrived for 10 seconds. | See below. |
Check connected stations
- Open Drones, select the drone, and open its Connectivity tab.
- Find Connected stations.
- Review the application, user, connection type, and start time shown for each entry. Web Suite, Harlock, and Arcadia identify known applications; you marks a connection belonging to your signed-in account.
The list is read from the selected vehicle's gateway and refreshes every 15 seconds while the tab is open. A station can appear as unknown when its application or user cannot be identified.
- No station is connected over the internet means the gateway returned an empty list.
- A message that the gateway does not provide the list means the information is unavailable; it does not prove that nobody is connected.
- If reading the list fails, check the link status and wait for the next refresh.
This list is informational. It does not assign exclusive control or stop another station from sending commands. Stations using a radio link do not appear. Use your normal coordination procedure before taking control.
A drone's telemetry endpoint and gateway id are set when its onboard computer is enrolled. They are not edited from Drone Control.
For usage-provider credentials and identifiers, use Configure SIM usage. For aircraft installation and access policy, use Setup and onboard computer.
Read flight data
The panel can show:
- current flight mode and armed state;
- relative altitude and climb or descent;
- ground speed;
- battery percentage;
- heading, pitch, and roll;
- throttle and available RPM;
- GPS fix and visible satellites;
- distance from Home;
- mission duration.
Relative altitude is the reported height above the autopilot’s Home reference, not necessarily height above the ground beneath the drone.
Battery status
Treat battery percentage as reported telemetry. If it is unavailable, contradictory, or changes unexpectedly, follow the aircraft’s normal battery checks and landing criteria.
Telemetry can be delayed or interrupted. Never use a single on-screen value as the only basis for a safety-critical decision.
Use the map
The map can show several vehicles at once, labelled with their names; the selected one's name is at the top left of the map instead. Select a marker to select that vehicle. When valid position telemetry is available, the selected drone's marker follows it. You can:
- switch between the available map layers;
- pan and zoom;
- on a wide desktop layout, use the arrow control at the map's left edge to hide or restore Select a drone;
- select Full screen to fill the screen with the map and Flight data, and press Esc or Exit full screen to leave;
- review the downloaded mission route and its numbered waypoint markers.
Turn on Keep the map centred on the vehicle to have the map follow the selected drone at the current zoom. Dragging the map turns it off. It uses the drone's available map position, which may be a recorded position when live location is unavailable.
The map view button is a small drawing of the other layer: fields and a river for Satellite, roads and a pin for Political. Select it to switch to that layer.
A Lizard, a Bulldog and an X84 each have their own silhouette on the map, seen from above and turned to the heading; a vehicle with no type is a plain arrow.
While an armed vehicle is heading somewhere the autopilot can name, a crosshair marks the point and a dashed line joins it to the vehicle: the current mission item in AUTO, Home in RTL.
Live and last-known positions
An offline marker is grey. The map may retain the last valid position seen by this page or show a position previously recorded by the Suite. The selected drone can also remain visible at its recorded position when no current GPS position is available.
A marker alone does not prove that the vehicle is still there. Check the link indicator, telemetry age, and GPS data before treating a position as current. If the Suite has neither a usable live fix nor a previous position, the vehicle has no marker even though it may appear in the list. Invalid coordinates such as 0,0 are not shown as a vehicle location.
Home marker
A house on the map marks the selected drone's Home while its telemetry is live.
Distance from Home is the horizontal distance between a valid autopilot Home
and the current GPS position. It is unavailable without either point or a usable
GPS fix. The Suite reads homeLat, homeLon and homeAltMsl from the LTE gateway;
it does not infer Home from the current position. Latitude or longitude zero
on its own is valid; the uninitialised pair 0,0 is not.
The RPM gauge uses the highest reported non-negative reading up to 3,000 RPM
as the main-rotor reading, independent of sensor order. Higher motor-speed values
are excluded; zero is a valid stopped-rotor reading and missing readings show
unavailable. The LTE gateway supplies the rpmReadings array; the Suite cannot
invent it if the aircraft/runtime does not provide it.
Airspeed is speed relative to the air, in metres per second. It is different from ground speed and does not indicate wind speed. Its availability depends on the aircraft's telemetry source.
The Home marker appears after the autopilot reports a valid Home position. It is the reference used for values such as relative altitude and distance from Home.
Home can be set or changed by the aircraft’s autopilot. If the marker is absent, do not infer Home from the takeoff location or the current drone marker.
The Home marker is not a promise of the final RTL destination. Autopilot configuration, rally points, mode settings, or in-flight conditions can affect Return to Launch behavior.
Download and inspect parameters
Available to Administrators and Operators with a selected drone and current connected telemetry. Parameters are read-only in the Suite.
- In the toolbar above the map, select Parameters. A panel opens beside the map.
- Wait for the panel to report how many values it read, or read the error if the request fails.
- Open a group, such as RTL or ATC, to read its parameters, or use Search by name to find one anywhere.
- Select Read again while connected to request a fresh copy.
Closing the panel does not cancel the request. Reopening it reuses the request or the values already fetched for that drone during the current page session. A cached result is a snapshot, not a live feed of parameter changes; read again when you need current values.
Save parameters
Select Save .params to download <drone-name>.params. The file includes all received parameters, regardless of the search. It saves a copy on your computer and does not write settings to the aircraft.
If the request is still running or has failed, do not treat a saved file as a complete backup. Read again after restoring the connection and confirm the value count before relying on a complete set. Saving is unavailable when no values have been received.
Change drones or leave Drone Control
Before selecting another drone, finish any mission upload or flight action in progress and verify the aircraft state. Changing selection resets controls associated with the previous drone; it does not stop that aircraft or disconnect its fleet telemetry link.
To end this page's remote telemetry connections, leave Drone Control or close its browser tab. Other Suite tabs, Harlock stations, and onboard services can continue independently. Stop video you no longer need, including detached windows, and complete any operational handover before leaving. For the separate access policy, see Remote access.
If the connection drops or becomes stale, the Suite reports the loss and disables actions that require current telemetry. There is no emergency-command exception over a stale link. Follow the aircraft's lost-link procedure, and reconnect only after confirming the correct selected drone.